Email Service
SILO offers email service to any public library in Iowa at no cost through AtMail. Each library gets email addresses that are specific to their organization and end with .lib.ia.us. Library staff can access their account from any computer with a web browser through webmail. Library staff can also access their email through Outlook and popular mobile devices. SILO provides support for Outlook, Thunderbird, IOS, and Android.
Instructions
Android
Set up Email on an Android Mobile Device
- On your Androd device go to Settings
- Tap Accounts
- Tap Add Account
- Enter your full email address: username@cityname.lib.ia.us
- Click MANUAL SETUP
- What type of account is this? Tap Personal (IMAP)
- Enter Password -> Next
- Save password to Google? Not Now or Save
- Incoming server settings
- Clear entry in Server, and enter: imap.us-east.atmailcloud.com
- Next
- In Outgoing Server Settings, be sure Require Sign On is On
- Clear entry in Server, and enter: smtp.us-east.atmailcloud.com
- A popup error occurs "Email security not guaranteed"
- Tap EDIT SETTINGS
- In Port: Enter 465
- Security Type SSL/TLS (accept all certificates)
Set up Calendars and Contacts on an Android Mobile Device
Android does not support syncing its built-in Calendar and Contacts apps with a CalDAV and CardDAV server like the one provided with your SILO email account, but this functionality can be provided by third-party applications. One such application is DAVx5 which is available for a small fee from the Amazon App Store, and the Google Play Store. It is also available from F-Droid.
Because this is a third-party app, State Library staff are unable to provide support for the app itself. We can only provide support for your account. However if you wish to implement this, you may find the following information useful:
- Install the DAVx5 app from one of the online stores.
- Lauch the DAVx5 app.
- Tap the + (plus) sign.
- On the Add account screen, enter the following information and when finished, tap the LOGIN button.
- Select the Login with URL and user name option.
- Base URL: https://silo.atmailcloud.com:8443/calendars/account@cityname.lib.ia.us
- Email address: account@cityname.lib.ia.us
- Password: Your current webmail password
- At the Create account prompt, tap the CREATE ACCOUNT button.
- Tap your account@cityname.lib.ia.us account.
- On the CARDAV tab, check the box next to Default Address Book.
- On the CALDAV tab, check the box next to Default Calendar.
- Tap the round synchronize button in the lower-right corner.
It may take several minutes for your calendar and contacts to fully synchronize with your mobile device's native apps.
Set up Email on a Samsung Mobile Device
Add Your Account
- From your phone's home screen, tap on the Email icon.
- In the upper left corner, tap on the hamburger menu icon.
- Tap on the gear icon.
- Tap on the +Add Account option.
- Tap on the Other icon.
- Enter your email address: account@cityname.lib.ia.us
- Enter the password for your email account.
- Tap Sign In
- Select Account Type: Tap IMAP
- Enter the following information for the Incoming Mail Server and Outgoing Mail Server, and when finished tap the Next button.
- Incoming Mail Server
- Change the IMAP Server to imap.us-east.atmailcloud.com
- Leave the Security type set to SSL
- Leave the Port set to 993
- Leave the IMAP path prefix blank.
- Outgoing Mail Server
- Change the SMTP Server to smtp.us-east.atmailcloud.com
- Leave the Security type set to SSL
- Leave the Port set to 465
- Leave the Request authentication to send emails option enabled.
- Incoming Mail Server
- Tap Next
- Leave the Manual setup sync period and schedule as is
- Tap Done
- Leave the Account name the same as your email address or enter something short and meaningful, for example: Work
- Change Your name to your full name with proper capitalization.
- Tap the Done button.
Remove Your Account
- From your phone's home screen, tap on the Email icon.
- In the upper left corner, tap on the hamburger menu icon.
- Tap on the gear icon.
- Tap on the name of your account.
- Tap on the Remove button to right of your account name.
- At the Remove account? prompt, tap on the Remove button again.
Email Sending Service
SILO offers a dedicated service for devices and systems that need to send but not receive email such as copiers, self-check machines, and automation systems. This service is easier to maintain, and it can be used to send more messages per hour than a SILO email account.
If you would like to use this service at your library, please send a request to helpdesk@silo.lib.ia.us. Specify that you would like to use the Email Sending Service. Include your contact information and your library's domain name, for example cityname.lib.ia.us. SILO staff will need to verify your domain with the service. Then we will provide all of the settings required to configure your device or automation system. Usually the verification process takes only a few minutes, but it can take up to 24 hours if there are delays in the DNS service.
Replies and Bounce Messages
You can configure your device or system with any email address that ends in @cityname.lib.ia.us. It does not need to be a valid email account name.
If you want to receive replies or bounces, you may also want to request an email alias that forwards messages to a valid email account. For example if Jayne Smith is responsible for the automation system at your library, you may want to set the FROM address in the system to catalog@cityname.lib.ia.us. You could then request an email alias for catalog@cityname.lib.ia.us that forwards messages to jsmith@cityname.lib.ia.us. If automation system cannot deliver a message to a patron, the bounced message will be sent back to catalog@cityname.lib.ia.us which goes to Jayne. Jayne did not need to give the automation system access to her email account, but this setup allows the automation system to send messages on her behalf.
iPhone and iPad
Set up Email on an IOS Device
- Go to Settings > Mail then tap Accounts.
- Tap Add Account, tap Other, then tap Add Mail Account.
- On the New account screen, enter the following information, and when finished tap Next.
- Name: Enter your full name
- Email: account@cityname.lib.ia.us
- Password: Enter the password for your email account
- Description: Enter a short description, for example: Work
- Choose IMAP for your new account.
- Enter the following information for the Incoming Mail Server and Outgoing Mail Server, and when finished tap Next.
- Incoming Mail Server
- Host Name: imap.us-east.atmailcloud.com
- User Name: account@cityname.lib.ia.us
- Password: Enter the password for your email account
- Outgoing Mail Server
- Host Name: smtp.us-east.atmailcloud.com
- User Name: account@cityname.lib.ia.us
- Password: Enter the password for your email account
- Incoming Mail Server
- If the email settings are incorrect, you'll be asked to edit them.
- If your email settings are correct, tap Save to finish.
Set up Calendars and Contacts on an IOS Device
Apple's iPhones and iPads fully support syncing with a CalDAV and CardDAV server like the one provided with your atmail account.
- Go to Settings > Passwords & Accounts.
- Tap Add Account, tap Other.
- Select the type of account you want to configure. Select Add CalDAV Account for a calendar, or Add CardDAV Account for contacts.
- Enter your account information and when finished tap Next.
- Contacts Server (CardDAV): silo.atmailcloud.com:8443/addressbooks/account@cityname.lib.ia.us
- Calendar Server (CalDAV): silo.atmailcloud.com:8443/calendars/account@cityname.lib.ia.us
- User Name: account@cityname.lib.ia.us
- Password: Enter the password for your email account
- If the settings are incorrect, you'll be asked to edit them.
- If your email settings are correct, tap Done or Save
MacOS
Set up Email on a MacOS Computer
- Start Mail app.
- From the Mail menu select the Preferences... option.
- Click the Accounts tab.
- If your SILO email address is not listed in the right column, skip to step 7.
- Click on your SILO email account and then click the - (minus) sign near the lower-left corner.
- At the Are you sure you want to remove the Mail account prompt, click the OK button.
- Click the + (plus) sign near the lower-left corner.
- Select the Other Mail Account... option and then click the Continue button.
- In the Add a Mail account window, enter the following information and when finished, click the Sign In button.
- Name: Enter your full name.
- Email address: account@cityname.lib.ia.us
- Password: Enter the password for your email account
- Enter the following additional information and then click the Sign In button.
- User Name: account@cityname.lib.ia.us (same as your Email address)
- Account Type: IMAP
- Incoming Mail Server: imap.us-east.atmailcloud.com
- Outgoing Mail Server: smtp.us-east.atmailcloud.com
- Leave the Mail and Notes options checked and click the Done button.
- Close the Accounts window.
Set up Calendar and Contacts on a MacOS Computer
Apple Calendar
- Start Calendar app.
- From the Calendar menu select the Preferences... option.
- Click the Accounts tab.
- If your SILO account is not listed in the right column, skip to step 7. (Your account may be named cityname.lib.ia.us)
- Click on your SILO account and then click the - (minus) sign near the lower-left corner.
- At the Are you sure you want to remove the CalDAV account prompt, click the OK button.
- Click the + (plus) sign near the lower-left corner.
- Select the Other CalDAV Account... option and then click the Continue button.
- In the Add a CalDAV account window, enter the following information and when finished, click the Sign In button.
- Account Type: Manual
- User Name: account@cityname.lib.ia.us
- Password: Enter the password for your email account
- Server Address: https://silo.atmailcloud.com:8443/calendars/account@cityname.lib.ia.us
- Close the Accounts window.
Apple Contacts
- Start Contacts app.
- From the Contacts menu select the Preferences... option.
- Click the Accounts tab.
- If your SILO account is not listed in the right column, skip to step 7. (Your account may be named cityname.lib.ia.us)
- Click on your SILO account and then click the - (minus) sign near the lower-left corner.
- At the Are you sure you want to remove the Contacts account prompt, click the OK button.
- Click the + (plus) sign near the lower-left corner.
- Select the Other Contacts Account... option and then click the Continue button.
- In the Add a Contacts account window, enter the following information and when finished, click the Sign In button.
- First menu: CardDAV
- Account Type: Manual
- User Name: account@cityname.lib.ia.us
- Password: Enter the password for your email account
- Server Address: https://silo.atmailcloud.com:8443/addressbooks/account@cityname.lib.ia.us
- Close the Accounts window.
Newsletters
There are specific tools available on the Internet for sending newsletters and other types of email marketing. These tools comply with US regulations related to the sending of commercial email. They are offered by reputable vendors that are recognized as legitimate email marketing firms, so messages sent by these tools are much less likely to be flagged as spam by your subscriber's email providers.
SILO email accounts are limited in the number of messages they can send per day (200-2400) and the number of recipients that can be included on a single message (100). These limits are enforced to prevent spammers from abusing an account to send out thousands of messages at once which would get all SILO email accounts blocked. While these limits don't interfere with typical email, they do prevent our email accounts from being used to send newsletters to a large number of subscribers.
Guide
TinyLetter is a free newsletter service offered by the email marketing firm MailChimp. The service supports up to 5,000 subscribers on a single account. To use TinyLetter you'll need to create an account on their system.
After you've created an account, you'll want to update your profile. Under your account menu in the upper right corner, select the Your Profile option. Update the First and Last Name field. This is the name your newsletter subscribers will see in their email.
Additional Options
There are a number of email marketing services available on the Internet. Some offer free service for a limited number of subscribers, while others offer a time limited free trial. If your newsletter requires additional features, search the web for recent reviews of email marketing services.
Other Clients
New Incoming IMAP Email
You can use IMAP to receive messages sent to your SILO email account. IMAP is an Internet standard that's supported by a wide variety of software and mobile devices to receive messages in your INBOX and access email messages stored in folders on the server. IMAP allows you to view the same messages that are available in webmail.
General Guidelines
- The incoming or IMAP server name should be imap.us-east.atmailcloud.com.
- The user name must be your full email address with the "@" sign: for example: account@city.lib.ia.us
- The password must be your email password. It's the same password used for webmail.
- If you're using software from Microsoft, such as Outlook, do not select the secure password authentication (SPA) option.
- The port number must be 993.
- The encryption method must be set to SSL/TLS.
- Do not set an IMAP Prefix Path if the option is available.
New Outgoing SMTP Email
You can use SMTP to send messages from your SILO email account. SMTP is an Internet standard that's supported by a wide variety of software and mobile devices to send email messages.
General Guidelines
- The outgoing or SMTP server name is smtp.us-east.atmailcloud.com
- The user name must be your full email address with the @ sign, for example: account@city.lib.ia.us
- The password must be your email password. It's the same password used for webmail.
- If you're using software from Microsoft, such as Outlook, do not select the secure password authentication (SPA) option.
- The port number must be 465.
- The encryption method must be set to SSL/TLS.
Authenticated SMTP
Some older applications and devices do not support authentication with a user name and password. If your device does not support entering a user name and password for outgoing SMTP email, it cannot be used with SILO email.
Outlook
Set up Outlook 365 on a Windows Computer
- Launch Microsoft Outlook 365 on your computer. If you are launching it for the first time, you will directly see the necessary window. If you have some other email accounts configured on Outlook already, you can click on File Menu > Add Account
- Enter your Email Address (xxx.lib.ia.us).
- Check the box that reads, "Let me set up my account manually."
- Click on Connect.
- Select IMAP.
- Enter the Incoming mail and Outgoing mail fields.
- Incoming mail Server: imap.us-east.atmailcloud.com
- Incoming mail Port: 993
- Incoming mail Encryption method: SSL/TLS
- Outgoing mail Server: smtp.us-east.atmailcloud.com
- Outgoing mail Port: 465
- Outgoing mail Encryption method: SSL/TLS
- Enter the password for your email and click Connect. Wait until the process finishes.
- Once connected, click Done to finalize the setup.
- If an error message appears, click the Change Account Settings option to return to the previous screen and double-check the settings.
Set up Outlook 2019 Email on a Windows Computer
- Open Outlook 2019.
- When a pop-up window appears, enter your custom email address (xxxx.lib.ia.us).
- Select Advanced options and select the Let me set up my account manually box.
- Click Connect to start the Outlook email setup process.
- On the Advanced setup window, choose IMAP.
- Enter the Incoming mail and Outgoing mail fields.
- Incoming mail Server: imap.us-east.atmailcloud.com
- Incoming mail Port: 993
- Incoming mail Encryption method: SSL/TLS
- Outgoing mail Server: smtp.us-east.atmailcloud.com
- Outgoing mail Port: 465
- Outgoing mail Encryption method: SSL/TLS
- Enter the password for your email and click Connect. Wait until the process finishes.
- Once connected, click Done to finalize the setup.
- If an error message appears, click the Change Account Settings option to return to the previous screen and double-check the settings.
Set up Outlook 2016 Email on a Windows Computer
- Start Microsoft Outlook.
- If Outlook opens a window that says Searching for accounts..., skip to step 12.
- If Outlook opens an Internet Email pop-up prompting for a Server, User Name, and Password, click the Cancel button.
You may need to click the Cancel button multiple times. - Click the File option, click the Account Settings button, and then select the Account Settings option.
- Click on the Email tab.
- If your SILO email address is not already listed in the Name column, skip to step 11.
- Click on your SILO email address and then click the Remove button.
- Do you see a warning message pop-up that starts with, "Before deleting your email account containing"? If so, you must delete your Outlook profile before you will be able to setup your email account. Follow these lettered steps, only if you receive the warning message:
- Click the OK button.
- Close Outlook.
- Click the Windows icon in the lower-left corner to open the Windows menu and type control in the search bar.
- Click the Control Panel Desktop app.
- Click the User Accounts option.
- Click the Mail (Microsoft Outlook 2016) option.
- Click the Show Profiles... button.
- Click on the Outlook profile, click the Remove button, and then click the Yes button.
- Close Outlook.
- Start Outlook
- Enter the profile name Outlook and then click the OK button.
- Skip to step 12.
- At the Do you want to continue? prompt, click the Yes button.
- Click the Close button.
- Click the New.... button.
- Enter your account email address, for example: account@cityname.lib.ia.us
- Click the Advanced options link and check the Let me set up my account manually checkbox.
- Click the Connect button.
- Click the IMAP icon.
- In the IMAP Account Settings window, enter the following information and when finished, click the Next button.
- Incoming mail Server: imap.us-east.atmailcloud.com
- Incoming mail Port: 993
- Incoming mail Encryption method: SSL/TLS
- Outgoing mail Server: smtp.us-east.atmailcloud.com
- Outgoing mail Port: 465
- Outgoing mail Encryption method: SSL/TLS
- Enter the password for your email account and then click the Connect button.
- Wait for Outlook to return the message Account successfully added.
- Uncheck the Set up Outlook Mobile on my phone, too box and then click the Done button.
- Click Close.
Additional Setup Steps
Subscribing to IMAP folders:
- Start Microsoft Outlook.
- Right-click on your account name account@cityname.lib.ia.us
- Select the IMAP folders option.
- Click the Query button.
- Select all folders that show up in the All tab.
Click on the first folder, hold down the shift key, and then use the down arrow key to highlight all folders down to the bottom - Click the Subscribe button.
- Click the Apply button.
- Click the OK button.
Set up Outlook Calendar and Contacts on a Windows Computer
Outlook does not support syncing its built-in Calendar and Contacts with a CalDAV and CardDAV server like the one provided with your email account. This functionality is provided by a third-party application called CalDav Synchronizer. This application is a Free and Open-Source Software (FOSS) project, and the installer can be downloaded from their website.
Because this is a third-party app, State Library staff are unable to provide support for the app itself. We can only provide support for your account. However if you wish to implement this, you may find the following information useful:
- Download the latest Outlook CalDav Synchronizer ZIP file from the download page.
- Extract the ZIP file.
- Run the CalDavSynchronizer.Setup program.
- Start Microsoft Outlook.
- Click the Calendar icon in the lower-left corner.
- Right-click on Calendar (This computer only) and select the New Calendar... option.
- In the Create new folder window, enter the following information and when finished, click the OK button.
- Name: Work Calendar
- Folder Contains: Calendar items
- Select where to place the folder: Calendar (This computer only)
- Right-click on Work Calendar (This computer only) and select the Rename Calendar option.
- Delete the words (This computer only) and press the enter key.
- Click the People icon in the lower-left corner
- Right-click on Contacts (This computer only) and select the New Folder... option.
- In the Create new folder window, enter the following information, and when finished, click the OK button.
- Name: Work Contacts
- Folder Contains: Contact items
- Select where to place the folder: Contacts (This computer only)
- Right-click on Contacts (This computer only) and the select the Rename folder option.
- Delete the words (This computer only) and press the enter key.
- Click the CalDav Synchronizer tab.
- Click the Synchronization Profiles button in the toolbar.
- Click the green + (plus sign) in the toolbar.
- Click the Generic CalDAV/CardDAV option and click the OK button.
- In the Options window, enter the following information, and when finished, click the OK button.
- Name: Calendar
- Outlook folder:
- Click the three dots button
- Select the Work Calendar inside the Calendar (This computer only) folder
- Click the OK button.
- DAV URL: https://silo.atmailcloud.com:8443/calendars/account@cityname.lib.ia.us/default/
- Username: account@cityname.lib.ia.us
- Password: Enter the password for your email account
- Email address: account@cityname.lib.ia.us
- Click the Test or discover settings button.
- Wait for the Connection test successful message, and then click the OK button.
- Click the green + (plus sign) in the toolbar.
- Click the Generic CalDAV/CardDAV option and click the OK button.
- In the Options window, enter the following information, and when finished, click the OK button.
- Name: Contacts
- Outlook folder: Click the three dots button, select the Work Contacts inside the Contacts (This computer only) folder, and click the OK button.
- DAV URL: https://silo.atmailcloud.com:8443/addressbooks/account@cityname.lib.ia.us/default/
- Username: account@cityname.lib.ia.us
- Password: Enter the password for your email account
- Email address: account@cityname.lib.ia.us
- Click the Test or discover settings button.
- Wait for the Connection test successful message, and then click the OK button.
- Click the OK button.
- Click the Synchronize now button in toolbar.
Current Compatibility Issues
Outlook can only track meeting responses and invites in the main calendar folder, but CalDav Synchronizer can only synchronize secondary calendar folders like the Work Calendar. This may lead to duplicate invitations and duplicate meetings in the main calendar and Work Calendar. Always send meeting invitations and respond to meeting requests from Webmail, because the email and calendar features are more tightly integrated. After the meetings are updated in Webmail, they will be synchronized to your Outlook profile.
Thunderbird
Set up Email on Thunderbird
Thunderbird is a free email application that’s easy to set up and customize. Click this link to be taken to the Thunderbird download site.
- Download the free Thunderbird App
- Run the installer (setup.exe you just downloaded)
- Select "Yes" to allow the app to make changes to your computer
- Select Next -> Leave as standard and click Next -> Leave the install path as is and decide if you want this as your default email program and click Install
- After it install, cleck Finish to launch it for setting up the necessary email settings.
You will see the following page. Fill it out accordingly.
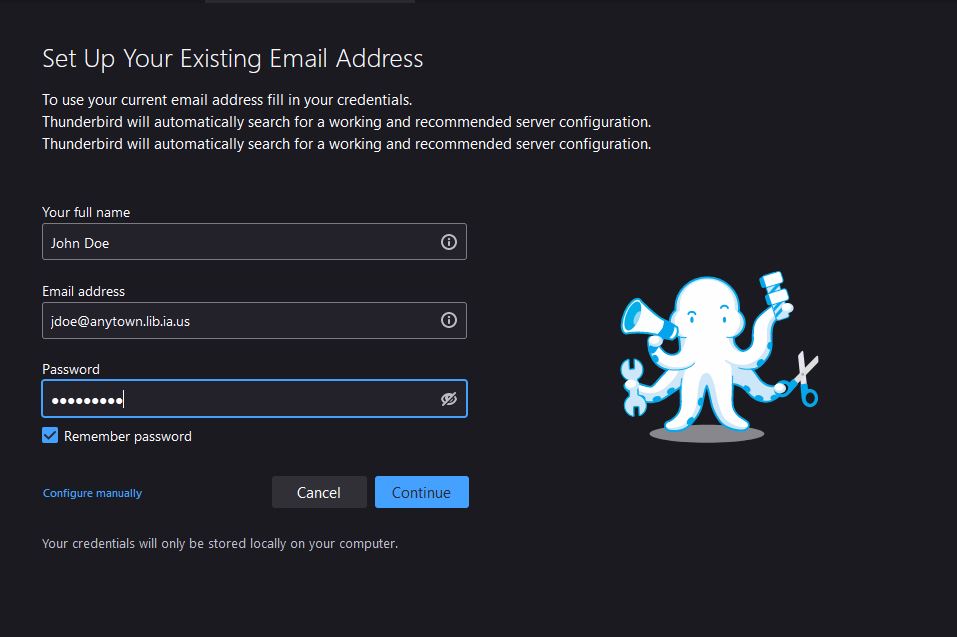
Use your full name, your SILO email address (lib.ia.us address) and then press continue.
Fill out the next page as seen below.
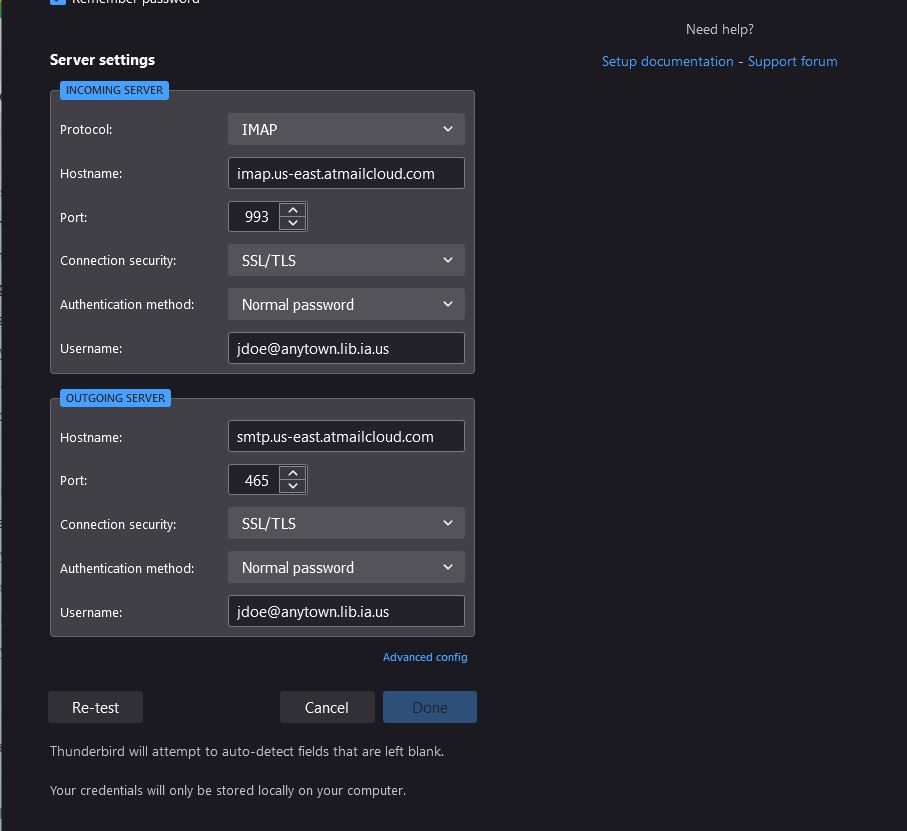
After filling out the page with the data as seen above, click the <Done> button.
It will run and create your account as seen below.
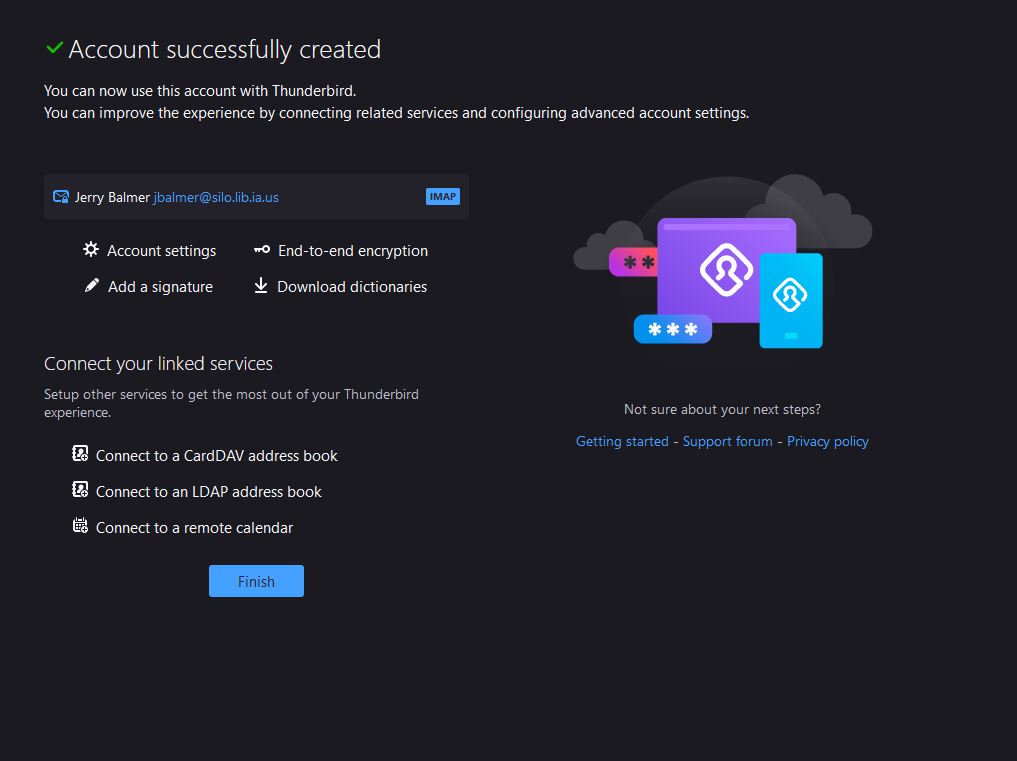
Your Thunderbird account is now setup.
If you are not seeing your folders, right-click on your account on the left and select Subscribe. Check the folders you want to see in Thunderbird
Thunderbird Contacts
Move Contacts from Webmail to Thunderbird
Thunderbird is a free email application that’s easy to set up and customize. These are the instruction for importing your email contact's from SILO's webmail mail to Thunderbird's email application. Unlike email, contacts are not kept in sync. They are treated as completly different entities. Once you have imported them from webmail to Thunderbird, you will need to add and delete them seperately.
1. Log into webmail, click on the box tiles and select Contacts.
2. Select "Export" to export contacts.
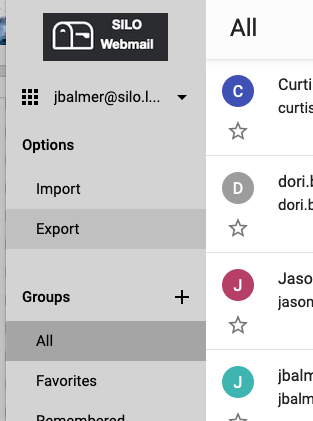
3. Select which Contacts you would like to export and click OK. In this example we are exporting all contacts.

4. Save the export in a location that you will be able to find to import into Thunderbird.
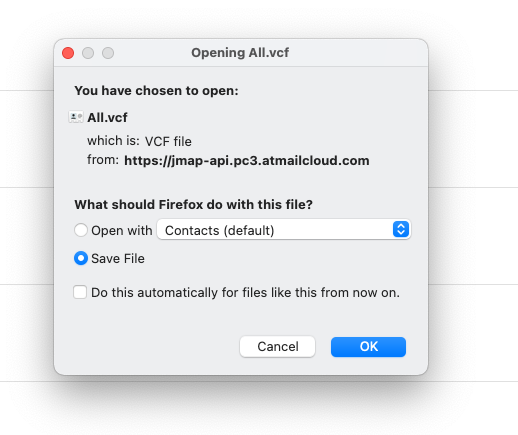
Now it is time to import the vCard file (.vcf) that was created into Thunderbird.
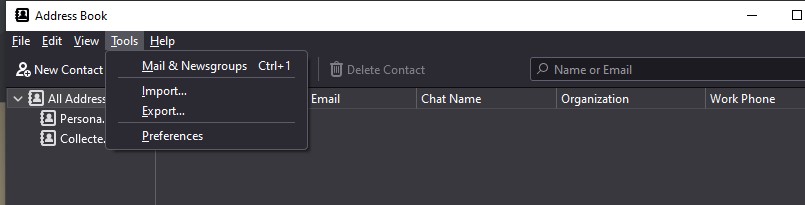
1. Select Address Book from the top toolbar of Thunderbird. This will open the Address Book in a new tab.

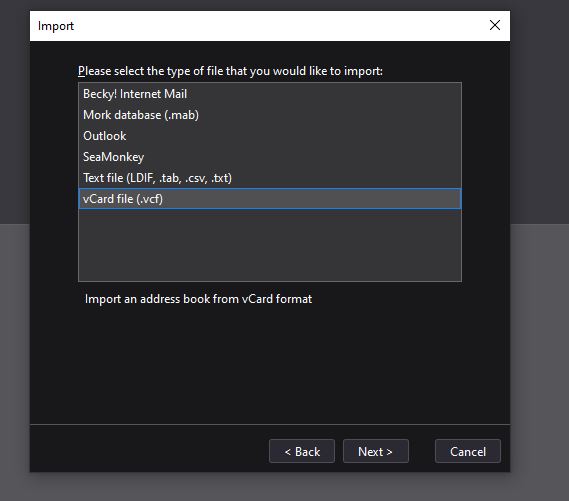
2. Select Tools then Import from the open Address Book window or tab.
3. Select the Address Books radio button and then click <Next>
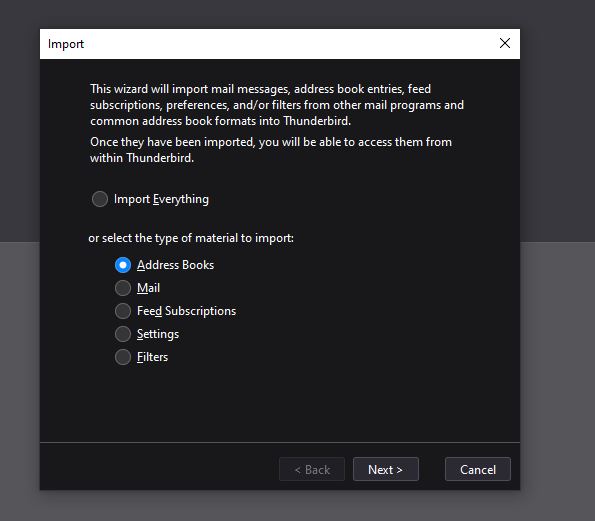
4. Select vCard file (.vcf) format and click <Next>
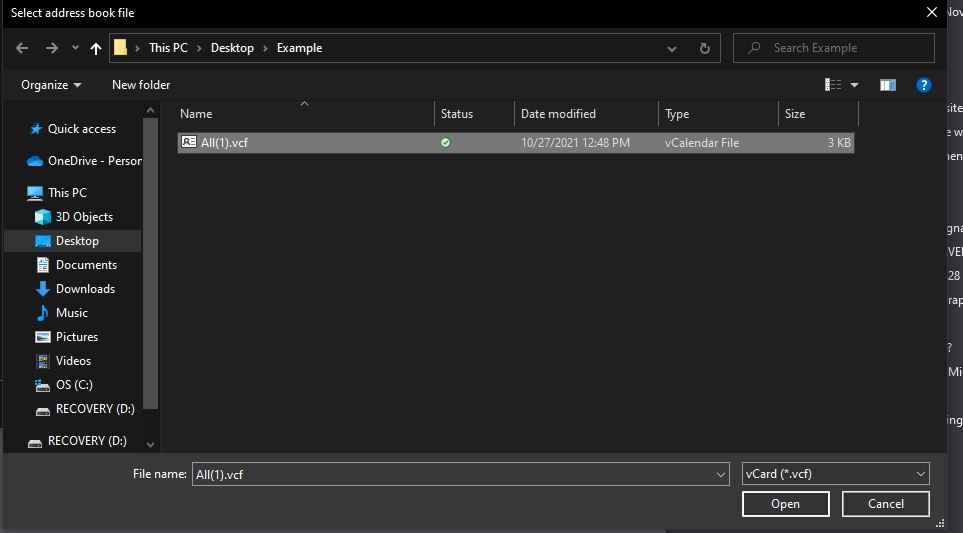
5. Navigate to where the file (vCard file) you created from webmail is located and select it. Click <Open>
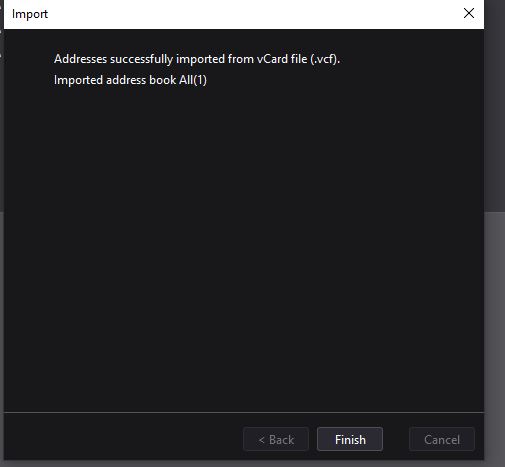
6. Your contacts will import and you will get the success message seen below. Your contacts have now been imported.
Webmail
How To: Setup Your Account
- Open a web browser.
- Go to https://silo.atmailcloud.com (Bookmark this link)
- Email is your full email address, for example: account@cityname.lib.ia.us.
- Password is your current email password. This is the same password you use for webmail.
- The first time you logon you will be required to change your password:
- Your current password is the same password you just entered.
- Your new password must contain at least:
- 8 characters
- 1 uppercase letter
- 1 lowercase letter
- 1 symbol
- 1 number
- After your new password is accepted, you must logon again with your new password to continue.
- You will see all of your messages and folders that have been copied over from the old system.
Icons To Watch For
Most of the icons are intuitive, but there are a few that are not immediately obvious. Look for these on the page, if you feel a little lost.
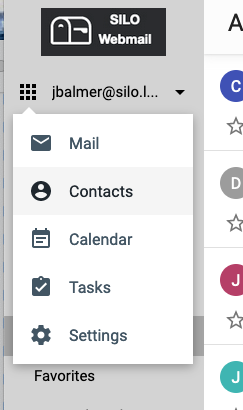
 |
This little 9-dot grid is displayed to the left of your email address in the upper left corner of webmail. Click on this menu icon to switch between Mail, Contacts, Calendar, Tasks, and Settings. |
 |
This icon is usually displayed in the lower corner of webmail. It is called the FAB or floating action button. Click on it to create a new message, event, contact, or task depending on the part of webmail you are current in. |
|
This little down arrow icon is displayed to the right of your email address in the uper left corner of webmail.
How To: Log In as a Webmail UserThis How To covers the new SILO Webmail which will be released on September 14th.
How to Sign Out of Webmail
How To: Access the Webmail Help CenterThis How To covers the new SILO Webmail which will be released on September 14th.
There are help sections for general information, your account, mail, calendar, tasks, and contacts. The mail section covers many features of your account including the basics, composing mail, organizing your inbox, settings and tips and tricks. How To: Reset Your PasswordIf you have not set a recovery email address on your SILO email account, please contact your District Library Resource Tech: Amanda, Dori or Trisha at 800-248-4483 option 3 to have them reset your password over the phone. The Forgot Password link on the login page will only work after you have set a recovery email address. If you follow these instructions before forgetting your email password, you will be able to login to your SILO email account even if you forget your password. Set a recovery email address
How To: Manage Your Spam SettingsManage SensitivitySILO email uses automatically updated spam filters to block most spam from getting to your inbox. Every message is assigned a spam score after it has been received. A higher score means the message is more likely to be spam. Your account has a sensitivity setting for classifying messages. When a message's spam score exceeds your sensitivity setting, it is classified as spam. To adjust this setting:
Sender FiltersYour SILO email account has two lists of addresses that can override the automatic spam filter. The whitelist is for sender addresses that should never be classified as spam. The blacklist is for sender addresses that should always be classified as spam. To manage these lists:
Each address must be entered on a line by itself. An address can be a complete email address or a domain. A domain is the part of an email address after the @ sign. To block all messages from jsmith@example.org, add Blocking SendersTo add a sender's email address to your blacklist while you are viewing a message, select the Block sender option from the three-dots menu to right of the message's date and time stamp. If the sender's address has already been blocked, this option will change to Unblock sender. Blocking and unblocking senders only updates the sender blacklist on your account. Unblocking a sender will not add the sender's address to your whitelist. Senders can only be added to the whitelist by editing this list in your account settings. Spam ReportingYour SILO email account can also be trained to identify legitimate messages and spam based on messages that you report. To mark messages as spam, click on the three-dots menu to the right of Trash icon and select the Report spam option. If a message is classified as spam incorrectly, click on the three-dots menu to the right of Trash icon and select the Not spam option. Using the Report spam option does not ensure that all future messages from this sender will be treated as spam. Use the Block sender feature described above to get that result. Reporting spam uses technology based on Bayes Filters. You will need to report a minimum number of messages as spam and not spam, before these reports will be used to help classify your incoming messages. While it largely depends on the number of words in each message, you should plan to report at least 20 spam and 20 not spam message before this feature will work. You should report a roughly equal number of spam and not message to maintain the effectiveness of your training database. How To Add Signatures to Sent Messages
|
 Login to SILO Webmail
Windows 10
Set up Windows 10 Mail on a Windows Computer
- Start Windows 10 Mail.
- If Mail opens the Add an account window, skip to step 9.
- In the left column, click the Accounts option.
- If your SILO email address is not listed in the right column under Manage Accounts, skip to step 8.
- Click on your SILO email address and then click on Change Settings.
- Click on Delete account.
- At the Delete this account? prompt, click the Delete button.
- In the right column under Manage Accounts, click the Add account option.
- Click the Advanced setup option. (Scroll down in the list of account types to access this option)
- Click the Internet email option.
- In the Internet email account window, enter the following information and when finished, click the Sign in button.
- Email address: account@cityname.lib.ia.us
- User name: account@cityname.lib.ia.us (same as your Email address)
- Password: Enter the password for your email account
- Account Name: account@cityname.lib.ia.us (same as your Email address)
- Send your messages using this name: Enter your full name
- Incoming email server: imap.us-east.atmailcloud.com
- Account type: IMAP4
- Outgoing (SMTP) email server: smtp.us-east.atmailcloud.com
- Leave all 4 boxes checked
- At the Your account was setup successfully prompt, click the Done button.
Set up Windows 10 Calendar and People on a Windows Computer
Windows 10 fully supports syncing the built-in Calendar and People apps with a CalDAV and CardDAV server like the one provided with your account. This functionality is restricted to select Microsoft partners including Apple, Google, and Yahoo. However, you can use a work-around to sync Windows 10 Calendar and People apps with your account.
Because this setup is not sanctioned by Microsoft, and it requires a workaround, this configuration is not supported by SILO or the State Library. However if you wish to implement this, you may find the following information useful:
- Start Windows 10 Mail.
- In the left column, click the Accounts option.
- In the right column under Manage Accounts, click the Add account option.
- Click the iCloud option.
- In the iCloud window, enter the following information and when finished, click the Sign in button.
- Email address: account@cityname.lib.ia.us
- Send your messages using this name: Enter your full name
- Password: Enter NOTPASSWORD as your password. Make sure not to enter your real password. The password you enter here’s sent to Apple.
- At the Your account was setup successfully prompt, click the Done button.
- In the right column under Manage Accounts, click the iCloud account and select the Change settings option.
- In the iCloud account settings window, make the following changes:
- Email address: account@cityname.lib.ia.us
- Password: Enter the password for your email account
- Account name: SILO
- Click on Change mailbox sync settings.
- Under Sync options, turn the Email option off.
- Click on Advanced mailbox settings.
- Change the Incoming email server to localhost
- Change the Outgoing (SMTP) email server to localhost
- Change the Contacts server (CardDAV) to https://silo.atmailcloud.com:8443/addressbooks/account@cityname.lib.ia.us
- Change the Calendar server (CalDAV) to https://silo.atmailcloud.com:8443/calendars/account@cityname.lib.ia.us
- Click the Done button.
Current Compatibility Issues
This configuration of Windows 10 Mail, Calendar, and People uses two different accounts: one for email and another for calendar and people. As a result you will not be able to send meeting invitations or respond to meeting requests via the Mail or Calendar apps. Always send meeting invitations and respond to meeting requests from Webmail, because the email and calendar features are more tightly integrated. After the meetings are updated in Webmail, they will be synchronized to your Outlook profile.
Due to subtle implementation differences in the calendar and contact standards, you may experience the following synchronization issues between the Windows 10 Contact and People apps, SILO Webmail, and other devices:
- Windows 10 Calendar app may return the error, "Your SILO account settings are out-of-date". If your calendar events are displayed correctly, your settings are correct and you can click the Dismiss button. If your events are not displayed, click the Fix account button, and check all your account settings against the settings listed in the steps above.
- The categories of phone number and email addresses (mobile, home, personal, work, etc.) may not synchronize correctly between devices. The actual numbers and addresses will synchronize, but each vendor uses different category names, so these may not synchronize correctly on each device.
- Contacts imported into your account through SILO Webmail before you setup the People app, may not be displayed in the People app.